MR51E Controller Setup
1.0 Introduction

Mercury’s MR51E Access Platform is a network connected, single-door, POE capable interface panel that provides an ideal integration solution when a network connection to the
door is desired.
Two reader ports support separate in/out readers of all types and technologies, including Wiegand, clock and data, magnetic stripe, F/2F, Supervised F/2F, keypads, LCD
and biometrics. Auto-addressable and directly managed by the Mercury intelligent controllers, the MR51e is capable of elaborate processes and procedures without host
intervention.
Built on the Mercury Access Platform, the MR51E SIO will relate the activities of selected system devices to other devices within the system, generating actions and allowing activities to transpire independently of the host. The MR51E’s support of paired readers enhances the ability to meet installation challenges, such as placing readers at varying heights or distances to accommodate ingress and egress of handicapped, vehicle and/or foot traffic. These readers can be logically linked together, yet function independently when access identification is presented to either one. When access rights are granted the same relay will function as programmed to unlock the opening.
The following steps explain how to add an MR51E controller to Doors.NET. The most important thing to be aware of is the fact that you must first add an EP4502 controller to Doors.NET before you can add the MR51E.
Note: Series 3 Mercury modules are fully compatible and interchangeable with Series 2 modules.
2.0 Hardware Configuration
2.1 Input Power
The MR51E is powered by one of two ways (jumper J5 selected):
- Power is supplied via the Ethernet connection using PoE, fully compliant to IEEE 802.3af
- Or local 12Vdc power supply - TB5-3 (VIN) and TB5-4 (GND)
2.2 Terminal Blocks

2.3 Jumpers

2.4 DIP Switches
All S1 switch settings are unassigned and are reserved for future use. Set all switches to the OFF position.

2.5 Communication Wiring
Communication between the EP controller and the MR51e is Ethernet. (10Base-T/100Base-TX).

3.0 Verify that an MSC Controller is Added and Online
- In Doors.NET, go to Setup >> Hardware Setup >> All.
- The hardware tree will be displayed and the MSC gateway will be listed at the top.
- Controllers will be listed underneath the MSC gateway.
- Select the EP4502 controller that the MR51E will communicate to.
- The EP4502 properties will be on the right.
- Verify that the EP4502 is online.

4.0 Configure the Network Protocol on the EP4502 Controller
The next step is to configure a network protocol on the EP4502 to allow it to communicate with the MR51E controller.
- On the hardware tree, expand the EP4502 and select the Network Devices node.

- From the ribbon bar at the top of the client, click on the Add Network Protocol icon.

- On the hardware tree, navigate to the new Undefined network protocol.

- The undefined network protocol properties will appear on the right.
- From the Protocol (Network) drop-down list, select Mercury Security.

- The Dialect can be left at the default of Controller Default.
- Save the network protocol settings.
- You will now be prompted to reset the EP4502 controller. Confirm to proceed with the reset.
5.0 Configure the MR51E for DHCP
The next step is to configure the MR51E to obtain a DHCP address. The controller should be added to the same DHCP network that the EP4502 and the hub is added. This will ensure that the DHCP address obtained by the MR51E is on the same range as these other two devices.
- Power-down the MR51E.
- Connect an Ethernet cable to the MR51E Ethernet port.
- On the S1 dip switch set switch 1 in the ON position.
- Ensure switches 2,3 and 4 are in the Off position.

- S1 Switch_Public_DHCP
- Power-up the controller.
- Within 2 minutes the controller will have received an IP address from the DHCP network.
6.0 Add the MR51E Controller
- On the hardware tree, navigate to the new network protocol which you have now added and configured for Mercury Security.

- From the ribbon bar click on the MR51E icon from the Mercury Security hardware group.

- The add MR51E dialog box will appear. Here you change the quantity of MR51E modules to add. You can also change the default description for the new module(s).
- Click the ACCEPT button and the new module will be added to the hardware tree.

- Expand the Mercury Security network node and you will see the new MR51E added.

- Select the new MR51E and the module's properties will be on the right.
- In the General >> MAC address field, enter the module's MAC address (this can be found printed on the module's Ethernet port).


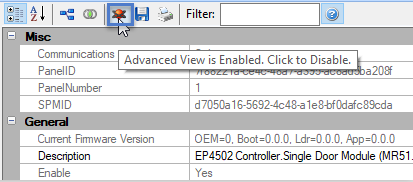
- Next, enable Advanced View for the device properties.
- In the Communications Interface section set the IP Mode to Public DHCP.

- Save the MR51E settings.
- Within a few seconds the MR51E should be online.
