Filters
Filters are used by the system to specify which system generated messages are displayed in the software as live event transactions. Any events which are not selected in the filter will not be displayed in the live events grid of the administrative client.
The system has 4 different filter types predefined: Access Denied (the most common access denied messages), Access Granted (the most common access granted messages), Concise setting (defaulted to the minimum display of event transactions, which is basically; alarms, troubles, and access granted messages) and the standard setting is defaulted to a few more events than concise.
All the events assigned to these filters are listed with a check box, all of these filter types can also be changed and altered at any time, or you can of course create your own filters.
None of these filters are assigned to any of the hardware, by default, meaning all the events generated by the system will appear in the user client in Live Events. However note that these filters ONLY affect the display of the event only as all events are recorded to the hard disk in the messages table.
Setup a Filter
This filter example will be setup and assigned to a reader connected to an NXT-MSC controller.
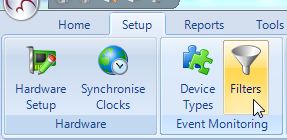
- Click Setup >> Filters (if the Filter icon is not displayed you will need to enabled Advanced View).
- With the filter highlighted, type in a new description in the description field then click the blue save/save all icon.
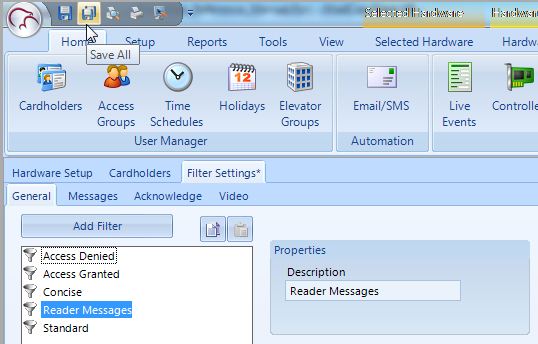
- Click the messages tab to select the event types to display in Live Events. The event types turn green when selected and will return to black once you have clicked save.
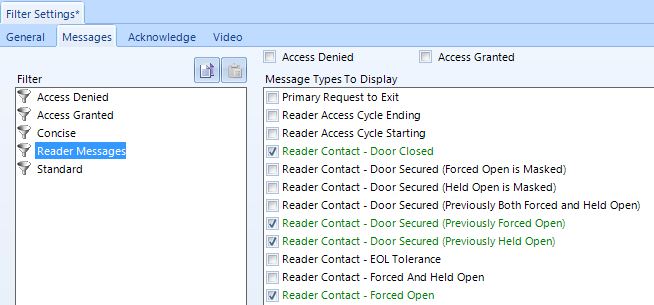
- In the above image you will see that there is also check boxes for Access Denied and Access Granted. This allows all the most common access denied or access granted messages (or both) to be quickly added when setting up a custom filter.
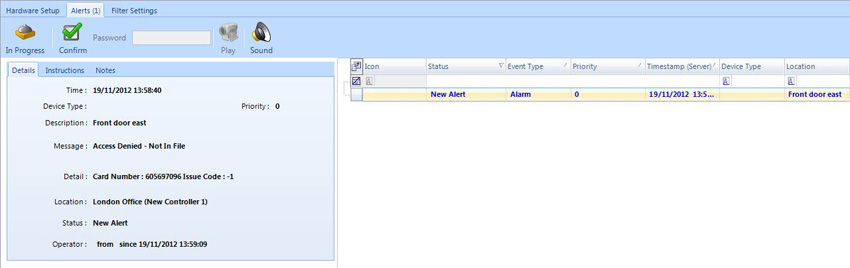
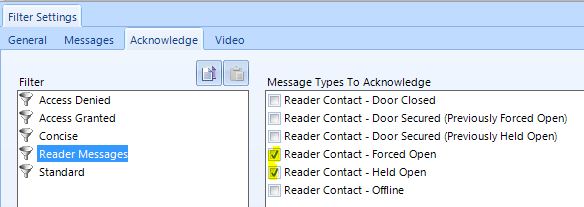
- For each message that has been selected it is also possible to enable it for acknowledgment. This acknowledgment flag will be placed in an additional queue and will create an 'alert' - which can then be configured (using device types) for an operator to take action on.
- The last tab in filter setup is the Video tab. This is for event video recording, when a camera is assigned to a hardware object, such as a reader or an input.
- Events are selected and when those events occur (such as a door forced events happens at a certain reader). You can chose to either create a short video clip (10-60 seconds) or have a live video window popup on screen.
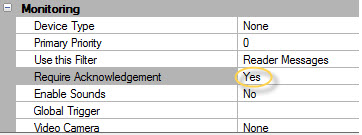
- To assign the filter to a reader, locate and highlight a reader in the hardware tree. In properties scroll down to Monitoring, then select the new filter from the 'Use This Filter' drop-down list.
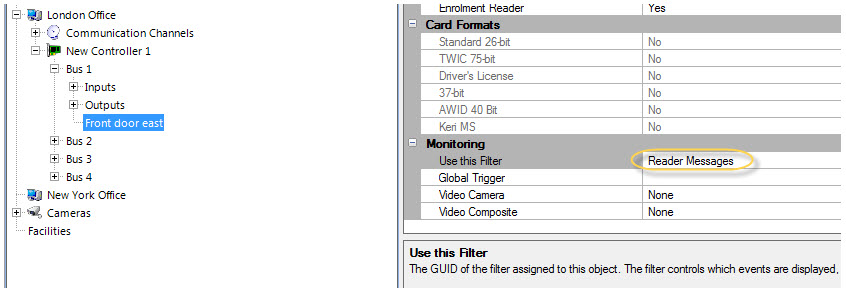
- When this filter is assigned to a reader only the messages specified will display in Live Events.
- The messages selected for acknowledgment will appear in the alerts grid once you have set 'Require Acknowlegement' to Yes. It may seem like you are making the same setting twice, but this is because multiple readers may be using the same filter and the allows certain readers to have acknowledgment disabled without affecting other readers.